tutorials
How to Set Up Email Aliases: The Ultimate Guide for Privacy and Organization

Loading...
Are you tired of giving out your primary email address for every online service? Learning how to set up email aliases can transform how you manage your digital communications. Email aliases are additional email addresses that forward messages to your main inbox, allowing you to maintain privacy while organizing your messages effectively. By understanding how to set up email aliases, you can create purpose-specific addresses without managing multiple accounts.
This comprehensive guide will walk you through everything you need to know about setting up email aliases on popular platforms like Gmail, Outlook, Google Workspace, and more. Whether you're concerned about privacy, want better inbox organization, or need professional role-based addresses, knowing how to set up email aliases is a valuable skill for modern email management.
An email alias is an alternative address that directs messages to your primary inbox. When you set up email aliases, you're essentially creating "pointers" to your main email account, not separate inboxes. For example, if your primary email is [email protected], you could set up email aliases like [email protected] that delivers to the same inbox.
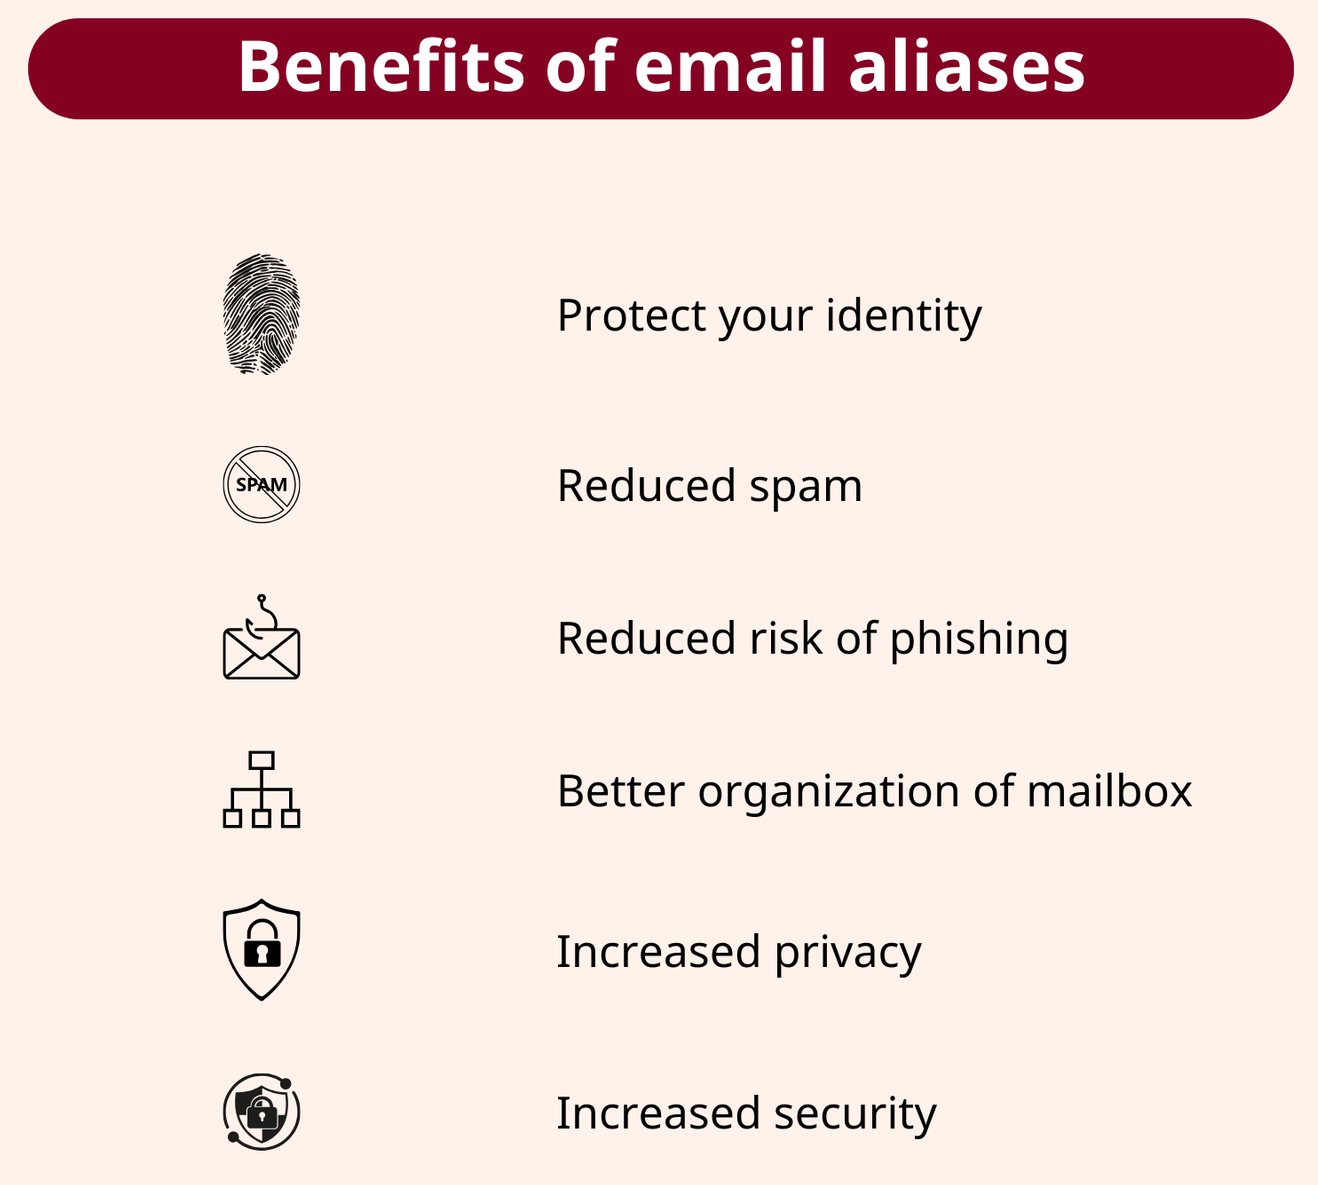
When you set up email aliases, you gain several strategic advantages:
Research shows that users who set up email aliases report up to 40% better email organization and significantly reduced inbox clutter. The ability to set up email aliases is particularly valuable for professionals managing multiple projects or roles.
Gmail offers two primary approaches to setting up email aliases:
The simplest way to set up email aliases in Gmail is by using the "+" symbol:
When you set up email aliases with this method, you can create unlimited variations. For organization, after setting up email aliases, create filters:
This approach to setting up email aliases is automatic and requires no additional configuration.
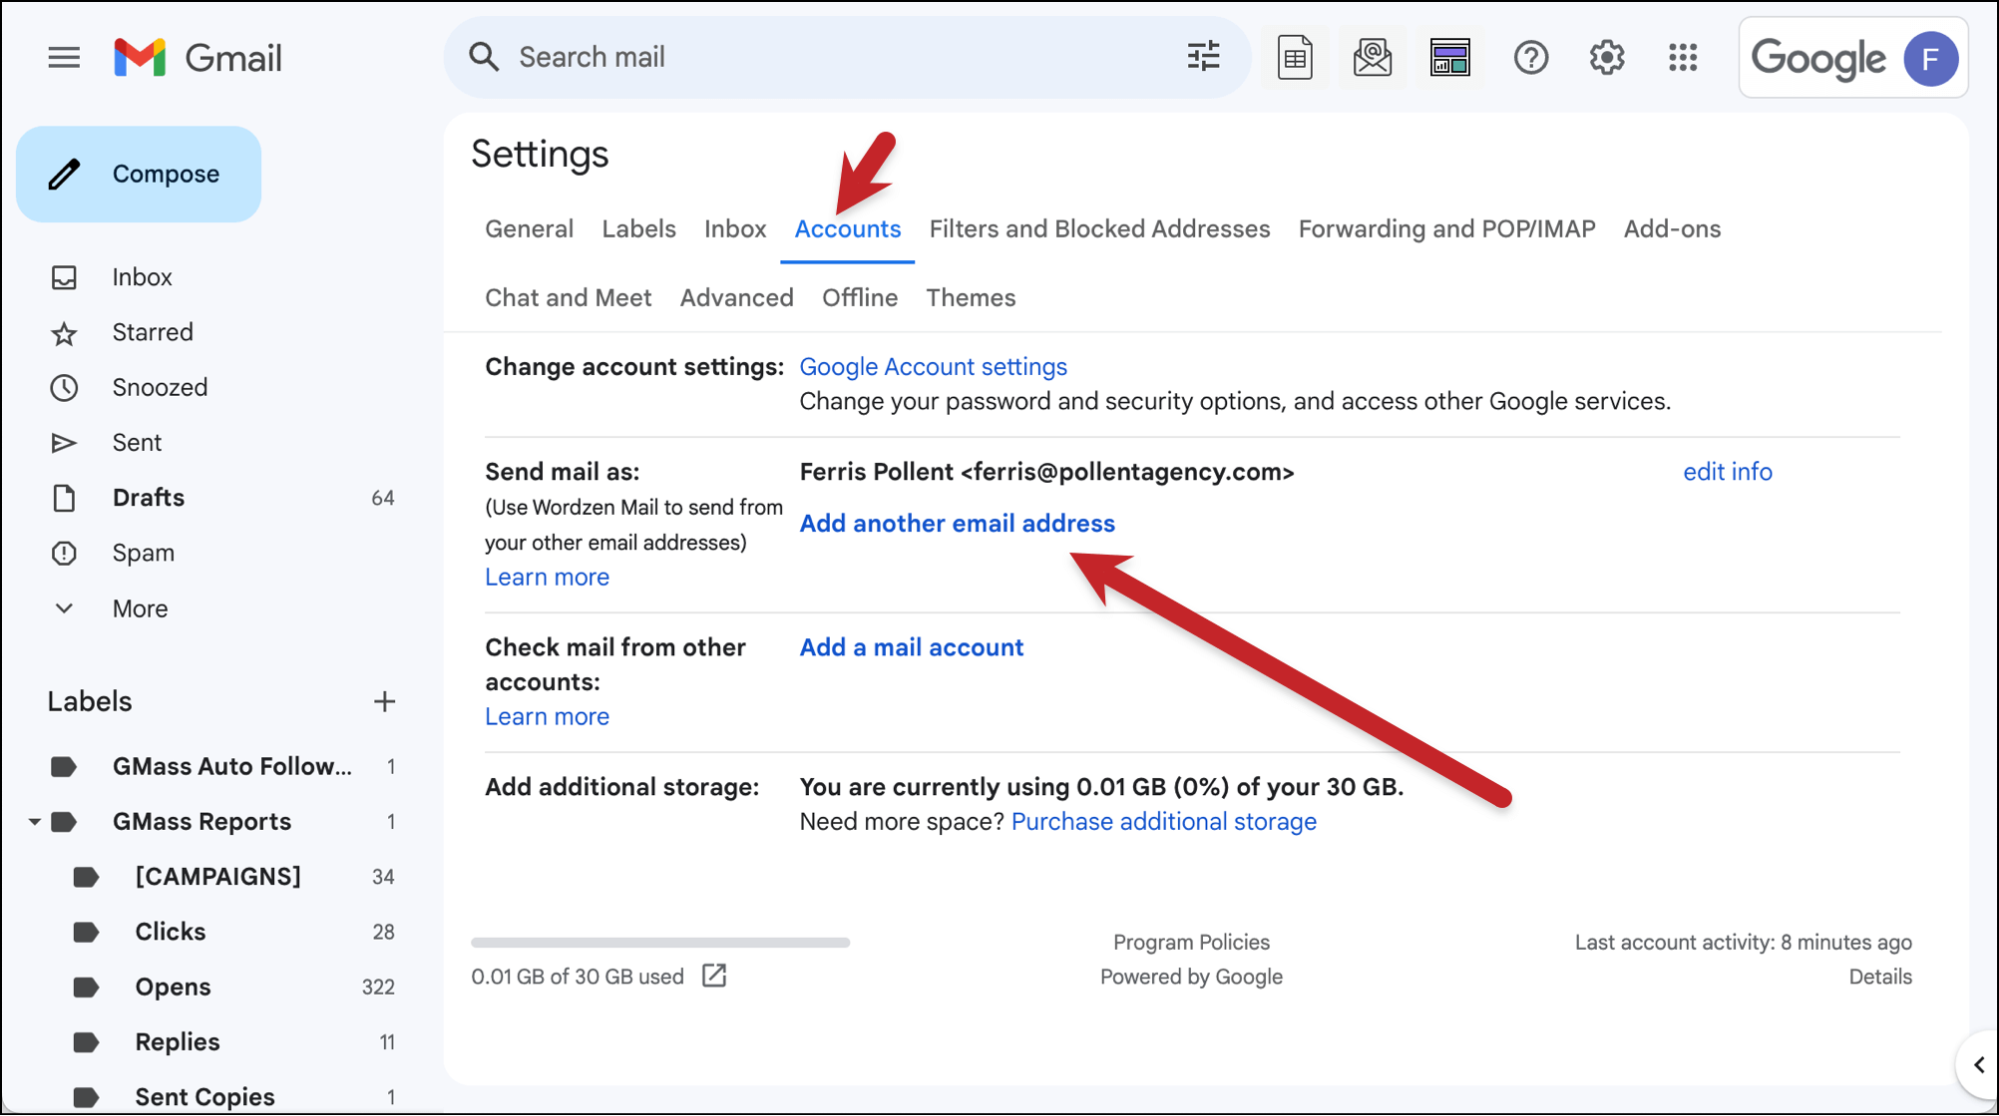
For more control when setting up email aliases in Gmail:
This method for setting up email aliases allows you to send emails from your aliases as well as receive them. Gmail permits up to 99 aliases when you set up email aliases this way.
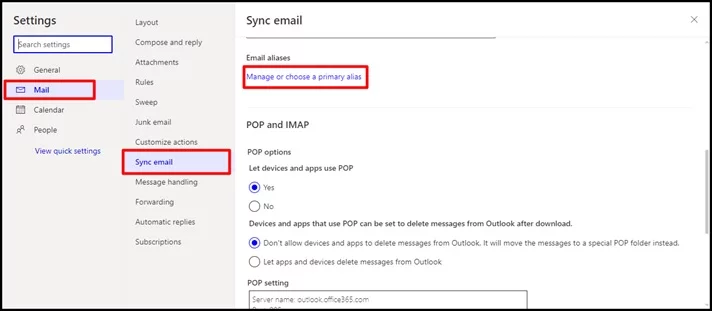
Microsoft's Outlook.com offers robust options for setting up email aliases:
When setting up email aliases in Outlook, remember these limitations:
After setting up email aliases in Outlook, you can send emails from any alias by selecting it from the "From" dropdown when composing messages.
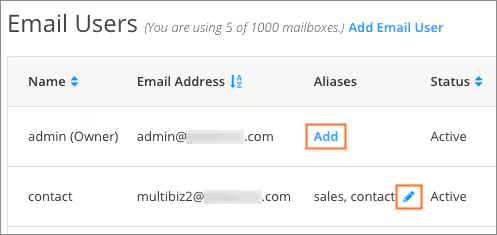
For business users looking to set up email aliases in Google Workspace:
When setting up email aliases in Google Workspace, administrators can add up to 30 aliases per user at no additional cost. After setting up email aliases, users must configure their Gmail settings to send from these addresses as described in the Gmail section.
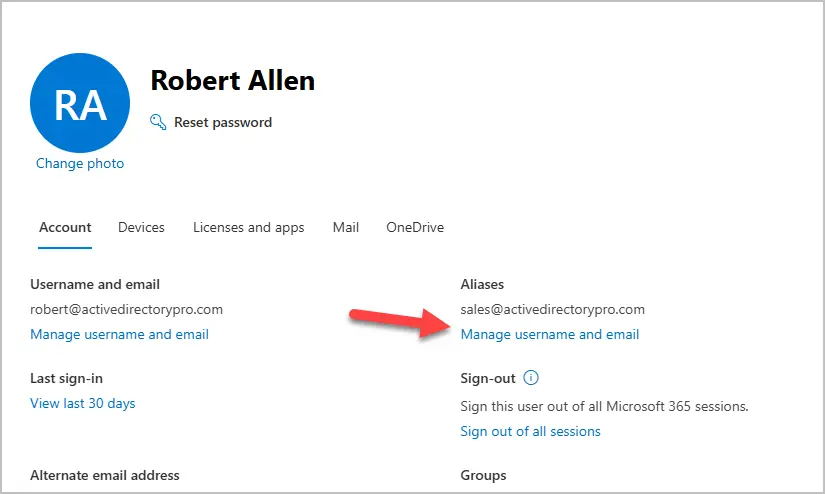
Business users can set up email aliases in Microsoft 365:
Microsoft 365 allows up to 400 aliases per user when you set up email aliases. To enable sending from aliases after setting up email aliases, administrators must run the PowerShell command: Set-OrganizationConfig -SendFromAliasEnabled $true.
Apple users can set up email aliases in iCloud Mail:
When setting up email aliases in iCloud, you're limited to three aliases per account. After setting up email aliases, you can send from them directly within the Mail app on Apple devices.
For maximum flexibility, many users prefer to set up email aliases with their own domains:
When setting up email aliases with custom domains, you gain complete control over your email addresses. After setting up email aliases this way, ensure your domain's MX records are properly configured.
Many domain registrars offer email forwarding for setting up email aliases:
Some providers also allow "catch-all" aliases when setting up email aliases, which forward all emails sent to any address at your domain to your main inbox.
To get the most from setting up email aliases, follow these best practices:
When setting up email aliases, adopt a systematic approach:
After setting up email aliases, create filters to organize incoming mail:
Periodically review the aliases you've set up:
When setting up email aliases for privacy:
After setting up email aliases:
Users sometimes encounter these challenges when setting up email aliases:
If emails to your aliases aren't arriving after setting up email aliases:
After setting up email aliases, ensure reply settings are configured:
Some users experience DMARC/SPF issues after setting up email aliases:
Be aware of provider restrictions when setting up email aliases:
Setting up email aliases is a powerful strategy for enhancing privacy, organization, and professionalism in your digital communications. By following the platform-specific instructions in this guide, you can set up email aliases that suit your specific needs, whether you're using Gmail, Outlook, Google Workspace, Microsoft 365, iCloud, or a custom domain.
Remember that successful email alias management requires consistent naming conventions, regular maintenance, and thoughtful implementation. As you become more comfortable with setting up email aliases, you'll discover new ways to leverage this feature for improved email management.
Start setting up email aliases today to take control of your inbox, protect your privacy, and create a more organized email experience. Your future self will thank you for the improved clarity and reduced digital clutter that comes from effectively setting up email aliases.